Difference between revisions of "Backpack"
From OCE Space Simulation
Patrickpowns (Talk | contribs) (Backpack documentation) |
Patrickpowns (Talk | contribs) m (Patrickpowns moved page Backpack Creation to Backpack: making redirects) |
||
| (20 intermediate revisions by 2 users not shown) | |||
| Line 1: | Line 1: | ||
| − | + | [[Category:Documentation]] | |
| + | [[Image:backpack_diagram.jpg|thumb|right|Diagram showing backpack components]] | ||
| − | + | ==Backpack Body== | |
| + | ===Materials=== | ||
| + | [[File:Oxygen_rig_and_backpacks.jpg|thumb|right|Complete backpack showing the location of the oxygen tanks]] | ||
| + | *Large bottle of LePage white glue. | ||
| + | *Generic white paper towel | ||
| + | *Water | ||
| + | *Xerox printer paper box (8x11) | ||
| + | *Plastic wrap | ||
| + | *Two blocks of 2x4 wood | ||
| − | + | ===Instructions=== | |
| − | + | ||
| − | + | ||
| − | + | ||
| − | + | ||
| − | + | ||
| − | + | ||
| − | + | ||
| − | + | ||
| − | + | ||
| − | + | ||
| − | + | ||
| − | + | ||
| − | + | ||
| − | + | ||
| − | + | ||
| − | + | ||
| − | + | #Fold a piece of paper towel twice lengthwise and tear into three equal strips. | |
| − | + | #Place a large plastic sheet on top of the 2x4’s to prevent mess. | |
| − | + | #Cover Xerox box with plastic wrap and place on the 2x4’s. | |
| − | + | #Mix glue and water in a large container to a 1:1 ratio. | |
| − | + | #Pour mixture into the small, clean, yellow trough (if it is still exists at spacesim). | |
| − | + | #Dip paper towel strips in mixture and place on the box vertically (always in the same direction). | |
| − | + | #Put on one layer then let dry for one day. | |
| − | + | #Repeat steps 6 and 7 until desired thickness. | |
| − | + | #Remove the box from the interior. | |
| − | + | ||
| − | 1 | + | |
| − | + | ||
| − | ( | + | |
| − | + | ||
| − | + | ||
| − | + | ||
| − | + | ||
| − | + | ||
| − | + | ||
| − | + | ||
| − | + | ||
| − | + | ||
| − | + | ||
| − | + | ||
| − | + | ||
| − | + | ||
| − | + | ||
| − | + | ||
| − | + | ||
| − | + | ||
| − | + | ||
| − | + | ==Oxygen Tanks== | |
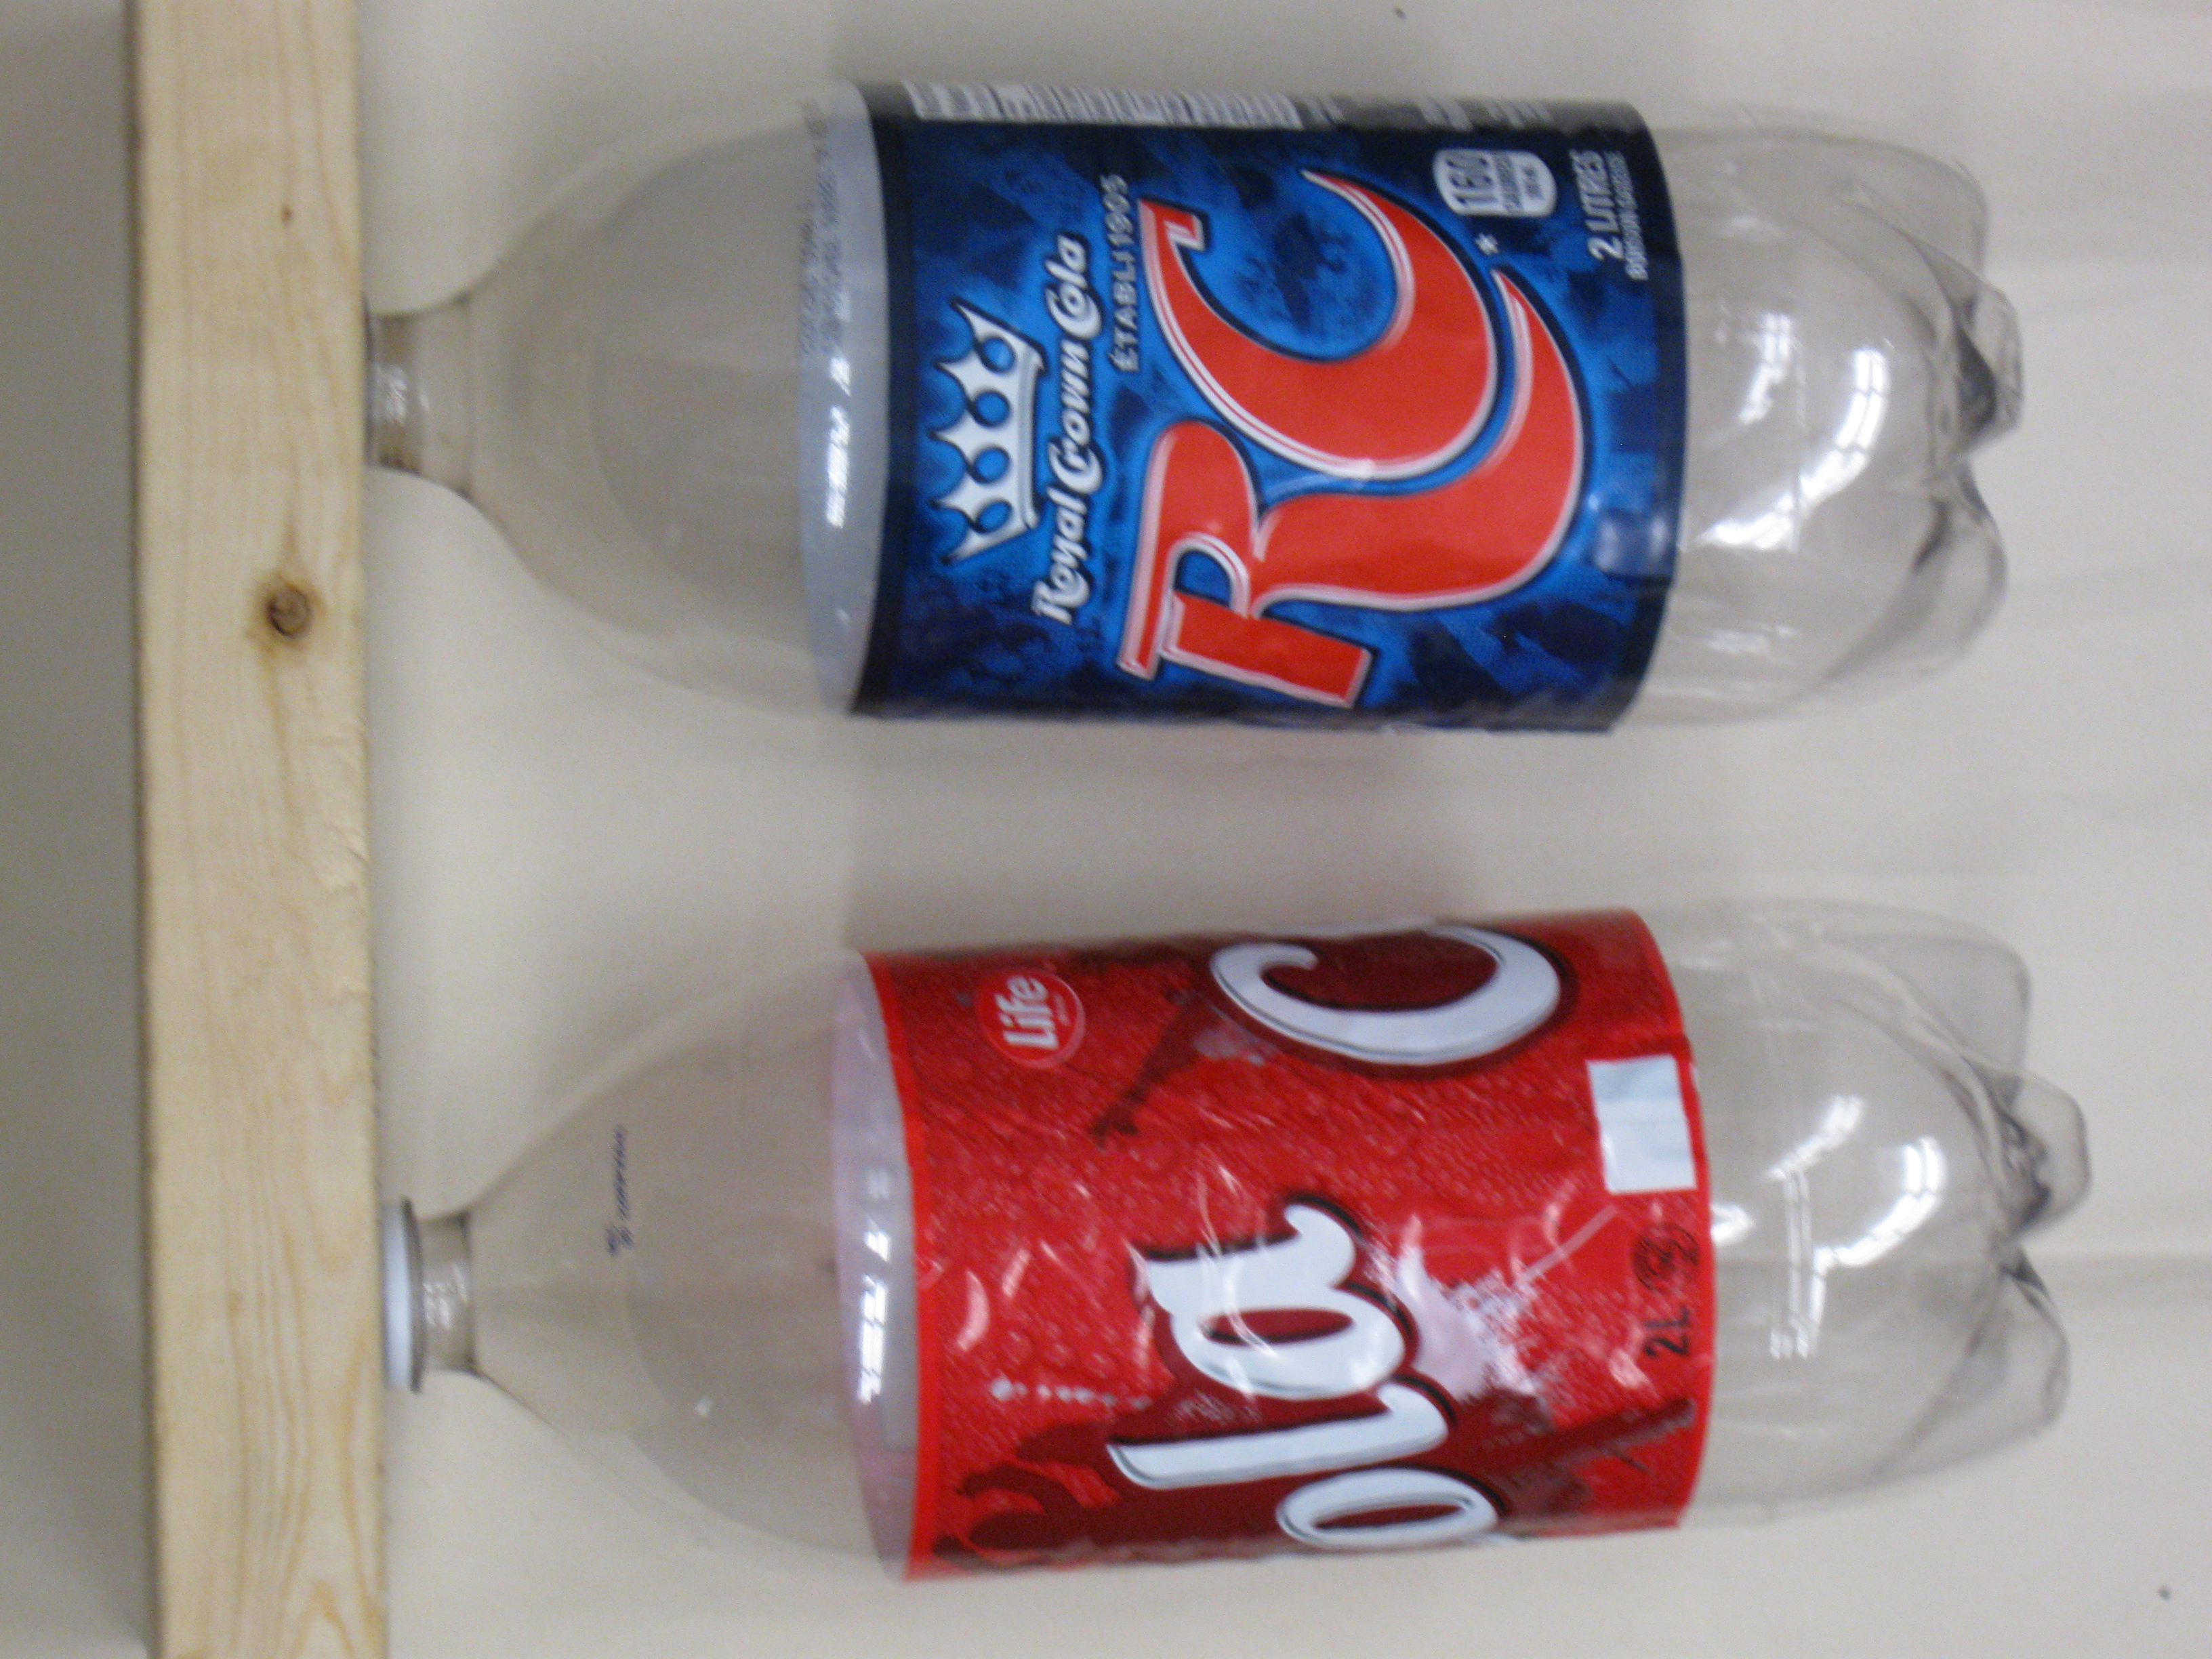
| − | + | [[File:A BETTER BOTTLE DIAGRAM ;).jpg|thumb|300px|right|top|Location of tank recepticles]] | |
| − | + | [[File:Air_tank_rig.jpg|thumb|right|bottom|Finished air tank assembly]] | |
| − | + | ===Materials=== | |
| − | + | ||
| − | + | ||
| − | + | ||
| − | + | ||
| − | + | ||
| − | + | ||
| − | + | ||
| − | + | *2 x 2L pop bottles | |
| − | + | *The caps | |
| + | *Thirsty people to drink the pop before use | ||
| + | *Drill | ||
| + | *Hot glue gun | ||
| + | *Glue for the gun | ||
| + | *Screws | ||
| + | *Block of wood (11 3/8)" x (3 7/16)" x (1 7/8)" | ||
| − | + | ===Directions=== | |
| − | + | ||
| − | + | #Clean the 2L pop bottles and let dry. | |
| − | + | #Center the two pop bottle lids on the block | |
| + | #Draw a circle around the centered pop bottle lids | ||
| + | #Drill a hole in the circled area 1 ½ cm wide and 1 ½ cm deep. | ||
| + | #Fill the hole with hot glue and center the cap inside the glue so the bottles can still be attached. | ||
| + | #Put a screw through the center of the cap while the glue is still hot to keep it attached better. | ||
| + | #Wait for it to cool. | ||
| + | #Be sure the bottles do not become permanently attached to the caps, so that it is possible to remove them | ||
| + | |||
| + | ==Sublimator== | ||
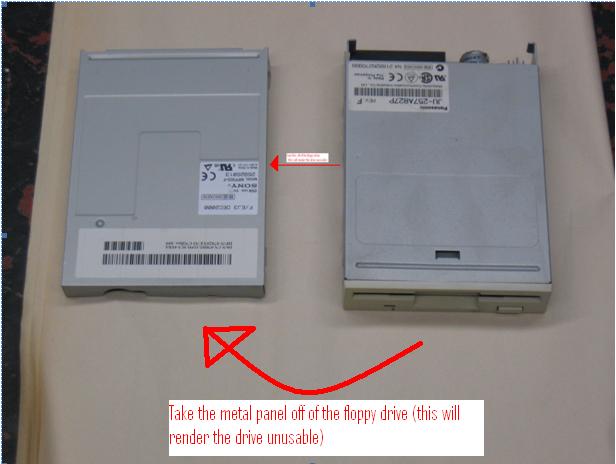
| + | [[Image:floppy drive diagram.jpg|thumb|260px|right|top|Sublimator panel creation]] | ||
| + | [[File:Sublimator.jpg|thumb|left|bottom|Side view of the Sublimator]] | ||
| + | ===Materials=== | ||
| + | *Floppy disk drive | ||
| + | *Screwdriver | ||
| + | *4 nuts and bolts for each one you are attaching | ||
| + | |||
| + | ===Instructions=== | ||
| + | #Remove metal panels from floppy drive. | ||
| + | #Place sublimator and drill 4 holes in each of the corners to attach to the backpack. | ||
| + | #Use nuts and bolts to attach sublimator to backpack. | ||
| + | #Repeat for each backpack. | ||
| + | |||
| + | == Backpack Straps == | ||
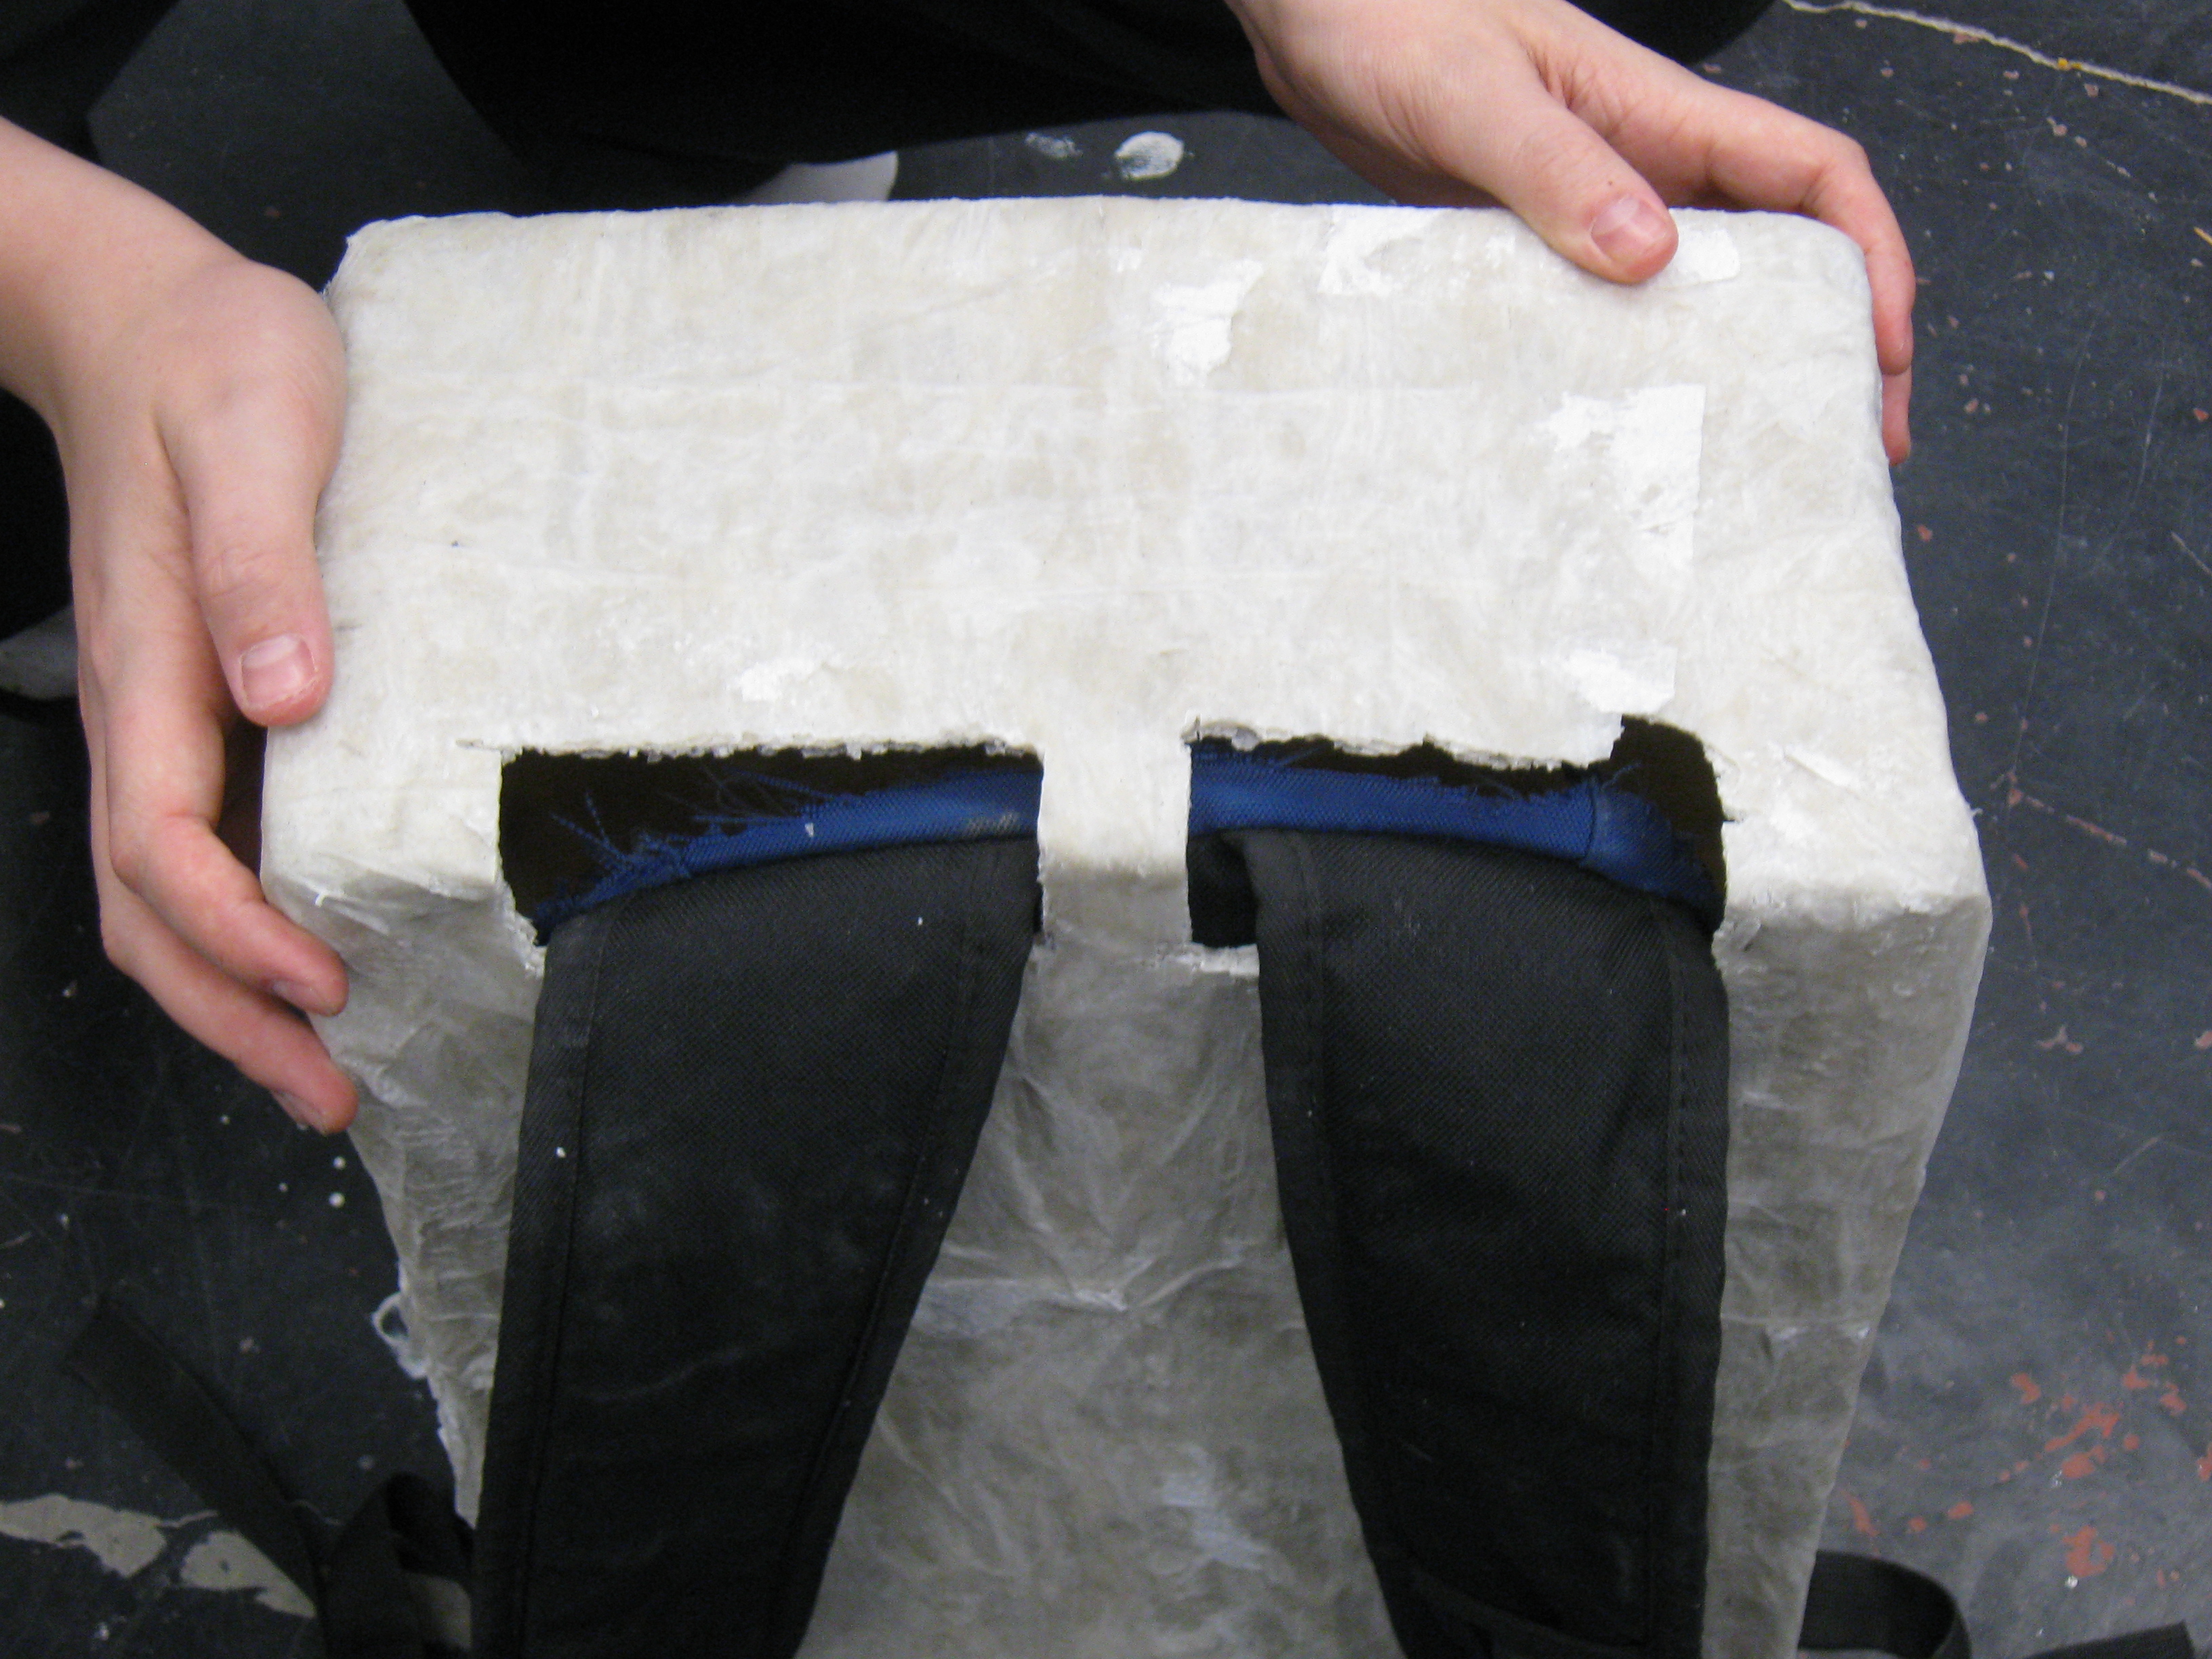
| + | [[File:Backpack_straps.jpg|thumb|right|top|Completed backpack with straps shown]] | ||
| + | ===Materials=== | ||
| + | *Backpack (will be cut up) | ||
| + | *Shears (to cut through fabric) | ||
| + | *Drill | ||
| + | |||
| + | ===Instructions=== | ||
| + | #Cut entire bag part off of backpack; keep straps and attaching fabric. | ||
| + | #Drill holes in the top of the backpack to match this. | ||
| + | #Take apart strap connection and insert as seen above. | ||
| + | #Reattach strap connection. | ||
| + | |||
| + | == Usage == | ||
| + | |||
| + | Once completed, the backpack will serve as an oxygen tank storage device for situations where a contained oxygen supply is required. It is compatible with all standard OCESS [[Helmet|helmets]]. Each tank contains 5 minutes of breathable air, for a total of 10 minutes in a single backpack (two tanks). | ||
Latest revision as of 19:10, 26 April 2013
Contents
Backpack Body
Materials
- Large bottle of LePage white glue.
- Generic white paper towel
- Water
- Xerox printer paper box (8x11)
- Plastic wrap
- Two blocks of 2x4 wood
Instructions
- Fold a piece of paper towel twice lengthwise and tear into three equal strips.
- Place a large plastic sheet on top of the 2x4’s to prevent mess.
- Cover Xerox box with plastic wrap and place on the 2x4’s.
- Mix glue and water in a large container to a 1:1 ratio.
- Pour mixture into the small, clean, yellow trough (if it is still exists at spacesim).
- Dip paper towel strips in mixture and place on the box vertically (always in the same direction).
- Put on one layer then let dry for one day.
- Repeat steps 6 and 7 until desired thickness.
- Remove the box from the interior.
Oxygen Tanks
Materials
- 2 x 2L pop bottles
- The caps
- Thirsty people to drink the pop before use
- Drill
- Hot glue gun
- Glue for the gun
- Screws
- Block of wood (11 3/8)" x (3 7/16)" x (1 7/8)"
Directions
- Clean the 2L pop bottles and let dry.
- Center the two pop bottle lids on the block
- Draw a circle around the centered pop bottle lids
- Drill a hole in the circled area 1 ½ cm wide and 1 ½ cm deep.
- Fill the hole with hot glue and center the cap inside the glue so the bottles can still be attached.
- Put a screw through the center of the cap while the glue is still hot to keep it attached better.
- Wait for it to cool.
- Be sure the bottles do not become permanently attached to the caps, so that it is possible to remove them
Sublimator
Materials
- Floppy disk drive
- Screwdriver
- 4 nuts and bolts for each one you are attaching
Instructions
- Remove metal panels from floppy drive.
- Place sublimator and drill 4 holes in each of the corners to attach to the backpack.
- Use nuts and bolts to attach sublimator to backpack.
- Repeat for each backpack.
Backpack Straps
Materials
- Backpack (will be cut up)
- Shears (to cut through fabric)
- Drill
Instructions
- Cut entire bag part off of backpack; keep straps and attaching fabric.
- Drill holes in the top of the backpack to match this.
- Take apart strap connection and insert as seen above.
- Reattach strap connection.
Usage
Once completed, the backpack will serve as an oxygen tank storage device for situations where a contained oxygen supply is required. It is compatible with all standard OCESS helmets. Each tank contains 5 minutes of breathable air, for a total of 10 minutes in a single backpack (two tanks).


